Posted on

The “Mixer” Quilt!

You have all heard of a “sampler” quilt – even if you have never quilted – I’m sure you have heard it somewhere in the past.  Well the newest rage is the “Mixer” quilt by Quiltworx.  It’s a new take on a variety of blocks that get put together, giving you the opportunity to try out different techniques along your quilting journey!

When you do a mixer quilt by Quiltworx, you can subscribe to an app called “Quiltster”, pick and choose the shapes and techniques you want to experiment with, color it with your own fabrics (or thousands of others available online), put it all together on your digital screen – before you even cut the first piece – to see if you like it, order the components you chose to make your creation and you are on the road to your masterpiece mixer quilt!

I’m currently working on a “Kaleidoscope” mixer which is made from all diamonds.  There are 15 diamond options to choose from, and you can rotate them any way you like.

With so many choices and available fabrics, every quilt that is designed in Quiltster is unique! The foundation paper piecing method that is used to put it all together, insures perfect points and precise blocks every time.  There is really no going wrong with the mixer patterns!

They are offered in 9 different mixer groups where the components can only be interchanged within a specific group.  You can choose from: Cattail mixer, Congo mixer, Hosta wall mixer, Kaleidoscope mixer, Meadow mixer, Solstice mixer, Stella Maris mixer, Sunrise mixer and Willow Star mixer.

They are all unique in their own way – and all fabulous to work with!  I’m sure to be teaching many classes on this new wave of quilting, and will be providing video guidance on how to prepare your components prior to class.  The link below will show you the Shimmering Star diamond graphic I have provided for one of my classes. This is a great sheet to color in and decide how you want to make your quilt look – even if you don’t have a subscription to Quiltster.

Shimmering Star layout

So stay tuned, and check out my classes on the “shop” tab, to see when you might be able to sign up for a mixer class – on zoom – or in our studio!


Posted on

Let’s talk about “bleeding”!

To WASH or NOT WASH – that’s the BIG question!

For all you crafters, makers and doers out there who have experienced some “bleeding” issues in your finished projects, this information may prove to be very helpful for you!

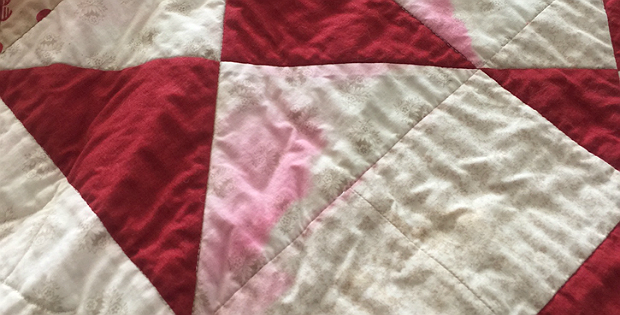
Yup, you were excited about a new project idea – went out to purchase fabric (or ordered it online), and wanted to get started right away.  You spent hours designing, cutting and sewing to make a perfect real life example of what you imagined your project to be – and then you put it in the wash.  Maybe you wanted to soften it up a bit, or make sure it held together before giving it as a gift.  Who knows why you threw it in that evil machine – but it came out looking like someone dragged it through a rainbow mud pit and was thrown up on by a heard of “red hot” eating Tasmanian Devils.

All the whites were pink with cloudy gray spots and that deep dark black looked like medium gray at best.  WHAT HAPPENED?!!

We have all experienced “color bleed” at some point in our lives, which is why we learned early on to sort our laundry into lights and darks!  Well, here I want to tell you about 3 products out there that may be of some help.

First off and easiest to use are “SHOUT COLOR CATCHER” sheets by S.C. Johnson.

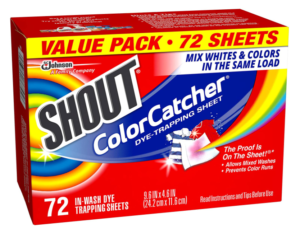
They look like a dryer sheet – but you put them in your washing machine with whatever it is you think will bleed.  You can put it in with a mixed load of laundry and save your wardrobe – or put it in with some fabric you just bought to make a quilt – or maybe put it in with a quilt you just made that you didn’t pre-wash the fabric for.  Anyway you use it, it will pick up any excess dye that releases from the fabric and floats around in your water to find an innocent white something that it can stick to.  Well, the color catcher hero will pick up this excess dye before it ruins your tighty whities – or your 100 hour quilt!!  As the box says, “The proof is on the sheet!”  Yup, the sheet goes in white and comes out some other combination of colors – and hopefully you have averted disaster with the things you were washing.

NOTE:  I always throw in a couple color catcher sheets when I wash a quilt for the first time – using COLD water.  Heck, I throw one in every time I wash a quilt – always using COLD WATER!!

The next product I’d like to mention is for anyone who likes to purchase hand dyed fabric, or who always prewashes fabric before making a project.

“RETAYNE” by G&K Craft Industries Ltd. Is a “color fixative for commercially dyed cotton fabrics”.

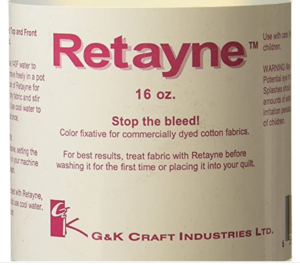
What this product does is set the dye into the fabric fibers so that it will not escape and disturb any of the other fabrics who are not paying attention behind their backs! You will want to use this to pre-wash your fabric BEFORE spending what seems like a lifetime turning it into a quilt.

Using Retayne requires a little more work.  There are detailed instructions on the bottle for hand washing or machine washing with top or front loading machines.  Basically you use 1400 water and add 1 teaspoon of Retayne for each yard of fabric in a 20 minute wash. This product does not work in energy-efficient top and front loading machines.  Those washing machines do not supply enough water to properly treat your fabrics with the product, so you would need to follow the handwashing directions.

You can test your fabric before deciding to use Retayne.  Do this by dampening a square of 100% cotton white muslin fabric and placing it on top of the fabric to be tested.  Iron the fabrics together with a hot iron until dry. Inspect the muslin.  If there is any sign of color transfer to the muslin, then you should treat your fabric with Retayne prior to using it in a project.

Finally, the last product I would like to mention is “SYNTHRAPOL” by G&K Craft Industries Ltd.  This product is also a liquid that will be added to water when washing fabric or finished quilts or other projects.

Synthrapol is actually a detergent that will suspend dye particles in the water so they won’t reattach to other fabrics.  The hope is that these dye particle escapees will just wash away in the water without doing any unwanted bonding with the next door neighbors. Basically you use 1 teaspoon of Synthrapol per gallon of 1400 water before immersing your fabric or quilt. What this product is actually doing, is removing any excess dye from the fabric – so the fabric may look lighter in color after you have treated it with Synthrapol.  Fabric dyers use it to remove sizing, oils, fingerprints, and other impurities that can interfere with the dying process.  They sometimes then use it to wash their dyed fabric to remove and suspend excess dye particles to be washed away – and sometimes they don’t.

The bottom line is; when you are buying hand dyed fabric to use in your projects, you may want to pre-wash with Synthrapol – or Retayne to either wash away those extra dye particles, or try to set them in the fabric to retain the vibrant color you loved so much when you purchased the piece!

That’s the difference between Synthrapol and Retayne.  The first one washes away the excess dye, and the last one tries to set it permanently into your fabric.

So to sum up.

  • Color Catchers will help to keep your bleeding fabric from getting onto your innocent bystanding fabric in the laundry. It will suck up any excess dye particles from the laundry water.
  • Retayne will set any excess dye into your fabric as long as you are using HOT water during the process and only using COLD to rinse it – and hang to dry. (After the fabric has been treated with Retayne and used in a project, subsequent washes should use cold or cool water – never hot)
  • Synthrapol will wash away any excess dye in the hot water and keep it from bonding with other fabrics. Your fabrics may appear lighter in color after using Syntrapol.
  • The key here is “heat”. Use it when using the above products, but make sure to hang dry or dry with no heat when you are done, and never use hot water again when laundering the project in the future!
Posted on

Pantone Colors

Ever wonder where the Pantone “color of the year” comes from?  Who makes that decision as to what color we are supposed to be wearing if we want to be “in style”?  I’d love to sit down at that table while the big “color people” are hashing out their decision over bagels and mimosas!  They probably start the meeting talking about what they did last weekend and where they were on vacation last month.  “The sand at St. Tropez was amazing!” “Hey, these Mimosas are fantastic!” “Can you pass the blueberry jam?” etc. etc.

The “new color” usually is announced in early December.  All the fashion industry and anyone who has anything to do with textiles, anxiously sits on the edge of their seats just waiting to jump on the wagon and produce the product that the “in crowd” will be salivating over in the coming year – using that Pantone color that no one can resist!

Who is Pantone?  Why do they get the right to choose for the world what is popular and what is not?

Pantone began in New Jersey in the 1950s as the commercial printing company of brothers Mervin and Jesse Levine, M & J Levine Advertising.   In 1956, its founders, both advertising executives, hired Lawrence Herbert as a part time employee.  Recently graduated from Hofstra University, Lawrence used his chemistry knowledge to systematize and simplify the company’s stock of pigments and production of colored inks. By 1962 Lawrence was running the ink and printing division at a profit, while the commercial-display division was US$50,000 in debt; he subsequently purchased the company’s technological assets from the Levine Brothers for US$50,000 (equivalent to $430,000 in 2020) and renamed them “Pantone”.

The company’s primary products include the Pantone Guides, which consist of a large number of small (approximately 6×2 inches or 15×5 cm) thin cardboard sheets, printed on one side with a series of related color swatches and then bound into a small “fan deck”. For instance, a particular “page” might contain a number of yellows of varying tints.

Basically, Pantone has created a system that is largely a standardized color reproduction system, and as of 2019 it has 2161 colors.  They call it a “color matching system”. By standardizing the colors, different manufacturers in different locations can all refer to the Pantone system to make sure colors match without direct contact with one another. The “Pantone Color Institute” created the CMYK process. This is a method of printing color by using four inks—cyan, magenta, yellow, and black. A majority of the world’s printed material is produced using the CMYK process. In 2001, Pantone began providing translations of their existing system with screen-based colors. Screen-based colors use the RGB color model – red, green, blue – system to create various colors.  I could go on about the PMS colors, or the GOE system Pantone introduced in 2007, or the new colors added to the CMYK process – making it now the CMYKOG process; but I digress.

So when did all this turn into a “color of the year” game?  In the year 2000,  the Pantone Color Institute declared a particular color “Color of the Year”.

I’m not really sure why, but they did. 

Now twice a year the company hosts, in a European capital, a secret meeting of representatives from various nations’ color standards groups. After two days of presentations and debate, they choose a color for the following year.  For example, the press release declaring Honeysuckle the color of 2011 said “In times of stress, we need something to lift our spirits. Honeysuckle is a captivating, stimulating color that gets the adrenaline going – perfect to ward off the blues.”

The results of the meeting are published in Pantone View, which fashion designers, florists, and many other consumer-oriented companies purchase to help guide their designs and planning for future products. In 2016 and 2021, Pantone chose two colors for Color of the Year.


Taking a look back since the Pantone “color of the year” was first declared, I thought it would be fun to design some quilts for each of the years in the color that was deemed the “cat’s meow”!  I made a short video for you to enjoy – just click on the link below and take a walk through the last 2 decades of color!


Posted on

The “biggest puzzle ever!”

This year 2021, is a “Technique of the Month” year with Quiltworx!  That means there is a new pattern that has several techniques released on January 1st to the public for purchase through certified shops and also through certified instructors who are teaching the workshops to complete the pattern.

I’m in the process of becoming certified through Quiltworx, and I am loving this new “TOM”, and how it all goes together.  I thought I would share my enthusiasm with my granddaughters who already know how to sew and make quilts.  I’ve featured them in this blog before – a couple years ago – when they had fun making a gift for their dad.  As they mature, they are very interested in having an online presence, and “working in the family business”.  I’m looking forward to encouraging them to keep on quilting, pick out fabrics, learn to paper piece – and teach others how to do so.  When they are excited, I’m excited!

Here is a little look at how they helped to put some of this year’s TOM – “Coral Reef” on the design board in my very cold garage.  LOL  They had a blast and can’t wait to come back to put the rest up.  I guess I better get busy piecing more of this quilt!

Coral Reef “Like a puzzle!”  
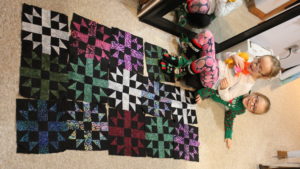
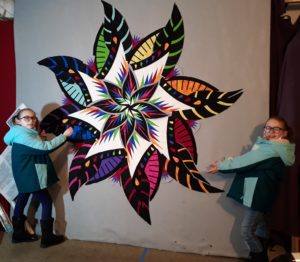
Click on this Coral Reef to see the kids in action!  It was a great brain exercise in spatial relations and map reading to get it up on the board the right way. Are you a quilter with a couple kids who are at home with remote schooling?  Having them quilt with you can be a great break from the zoom drudgery – yet still be a bit educational.  😉

Stay tuned to see the finished quilt!  It’s only about half way done at this point – so much more piecing to get finished!


Posted on

October is for MYSTERY & Adventure!

Here comes Halloween and what every kid knows is the best time for Mystery and Adventure!  Dressing up, braving the elements, walking the streets in the dark, knocking on stranger’s doors – getting candy for free!!?  Everything we teach our kids not to do the whole rest of the year!

Well, I bring you a perfectly safe and fun “3D Mystery Adventure!” that I like to call Hugs & Kisses.  This is a “quilt-along” at your own pace sort of mystery quilt.  I’m providing 8 clues for the total project; the first one being posted via Facebook / TheMasqueradeNH on October 1st, 2019 at 10am.  You can also click on this link to get Clue 1 right here!

CLUE 1 and Supply List

After that you will be able to receive each of your next clues at your own pace!  Just send a pm via Facebook or email to TheMasqueradeNH @ gmail.com with a picture of your  finished clue pieces, and I will send you the next clue!

The only rules are:

  1. Do Not post any pictures of your progress (after Clue 4) publicly – definitely NO FINISHED QUILT pictures until after October 1st 2020.  I’m keeping this mystery running for the entire year so those who sew at a slower pace, or have way too much life getting in the way, can still have the fun of the mystery revealing itself in their own sewing space.
  2. Do Not request a clue every day.  Please take a break for 1 day in between requests so that you can catch up with things like shopping, cooking, kids, cleaning, laundry – did I say that?!  Anyway, it will give me time to keep up with the requests if this becomes a popular project.
  3. Please DO share this project with other quilting friends, so they can sew along with you and the rest of the group!  I will start an email list for anyone who is not on Facebook – and I promise I will never send out spam or sell your email address to a third party. (I hate that stuff!!!!)

That’s it!  Three simple rules!  The 8 clues will become your own copy of the pattern – and during this year it is totally FREE.  After that I will offer it for a minimal download fee on this website.

So make sure to check out www. facebook.com /TheMasqueradeNH to see any new information on our adventure, or send me an email: TheMasqueradeNH @ gmail.com  or   Donna @ TheMasquerade.net to be put on my 3D Mystery list.

During COVID19 “shelter at home” orders, I have decided to allow clue requests on a daily basis – so what are you waiting for?  Start a new fun project, and see your finished quilt in just over a week!  Your first clue is at the link above – and now I’m providing a second one! Click on this link for your Clue 2 !

I’ve conveniently put together some kits of fabric, like the one pictured above for those who are too busy, or have difficulty picking fabric.  You will find a variety of kits choices on the “SHOP” page under “Project Kits” right here on this website.  However, if you want to shop for your own fabric, this is what you will need:

  1. 4 variations of neutrals ranging from white to black (with gray in between) or beige to brown (with gradations of tan in between).  1 yard of each.  If you often make mistakes while you quilt, then buy 1.25 yards of each – for piece of mind. These variations should show contrast between each step.  White/light gray/medium gray/dark gray – are a good example.  Or for a darker quilt, start with the light gray/medium gray/dark gray/black.  These fabrics will be numbered 1 – 4 from light to dark.
  2. Two colors that you love to combine – also in light, medium, dark variations.  You will need 1/4 yard of each as follows: light color 5 and medium version of the same color (we will call it color 6); medium color 7 (a different color than color 5, and make sure it’s one you like combining with the first one!), and a dark version of the same color.  For example, you might like to choose a light blue and medium blue, a medium green and a dark green as your 4 choices.  You will need just 1/4 yard of each.
  3. Finally, if you want to add a narrow border to your quilt, I suggest just a 3″ border.  You will need to purchase an additional 3/4 of a yard of one of your first 8 fabrics, or choose a different fabric that combines well with all the others.  You may also want to bind your quilt with the same fabric.  That would be another 1/2 yard.
  4. Backing fabric will require 4 yards of 42″ wide, or 2 yards of 106″ wide fabric.  The finished size quilt is approximately 62″ x 82″

Hope you decide to join the fun!

Till next time,

Smiles,

Donna Viau

Posted on

The Season of Giving

Winter is upon us, and so is the cold weather up here in the North East.  That means cuddling up with a cozy quilt, and getting a toasty fire burning.  For me, it’s time to start a new quilt.  Recently, I’ve decided to teach my twin grand daughters how to sew.  When they were just 5 yrs old, I bought them each a little sewing machine – more of a toy than anything else, but they really did sew!  We started with sewing on paper without threading the machine – to practice manipulating the page to follow some lines – to see if we could make the machine sew where we wanted it to.  When we finally put some thread in the needle – we got busy making some simple puzzle quilts using squares and rectangles.  They were so proud of their first creations!!

Now they are 6 1/2 yrs old and itching to do more sewing/quilting.  We’ve worked on triangles and are in the process of putting together a fun quilt for their Dad as a gift.  The quilt has 30 blocks – each girl is trying to get 15 blocks complete. I’ll quilt and bind the quilt for them – after all, he is my son.  LOL

We found an easy block that has 4 half square triangles, 4 rectangles and a center square.  When the blocks are all put together, the girls decide it looks like a snow flurry.  So that’s what we are calling the pattern – “SNOW FLURRIES”.  I’m offering it here as a FREE download for those who want to tackle what my 6 yr olds are doing.  If you want to try teaching your child how to quilt; just be prepared for many moments of distraction, lots of irrelevant questions and tons of fidgeting at the machine.  If you can get past all of that; it’s fun to see them learn and grow with a new skill.  We try to sit down to quilt for no more than an hour at a time.  Any more would be too much for a child that young.  As it is, after 45 minutes they are itching to do something else – but it takes them an hour to make 1 block (at least it did at the beginning of the quilt)!

Fast forward from September 19th, to December 17th – and the quilt is done!  By the end, they were each able to finish 3 blocks in an hour.  Good thing, too – as they wanted to give this quilt as a gift and time was running out!  I kept the quilting simple – so it wouldn’t outshine all their hard work.  This is a gift that will be cherished, I’m sure.

They are happy to share their adventure.  So enjoy the following pictures.

If you want to try your hand at this fun quilt,  just click on the link below (“Snow Flurries Pattern”) to download your FREE copy of the pattern today!

Halfway done with the quilt and progress is getting quicker – two blocks in a day!

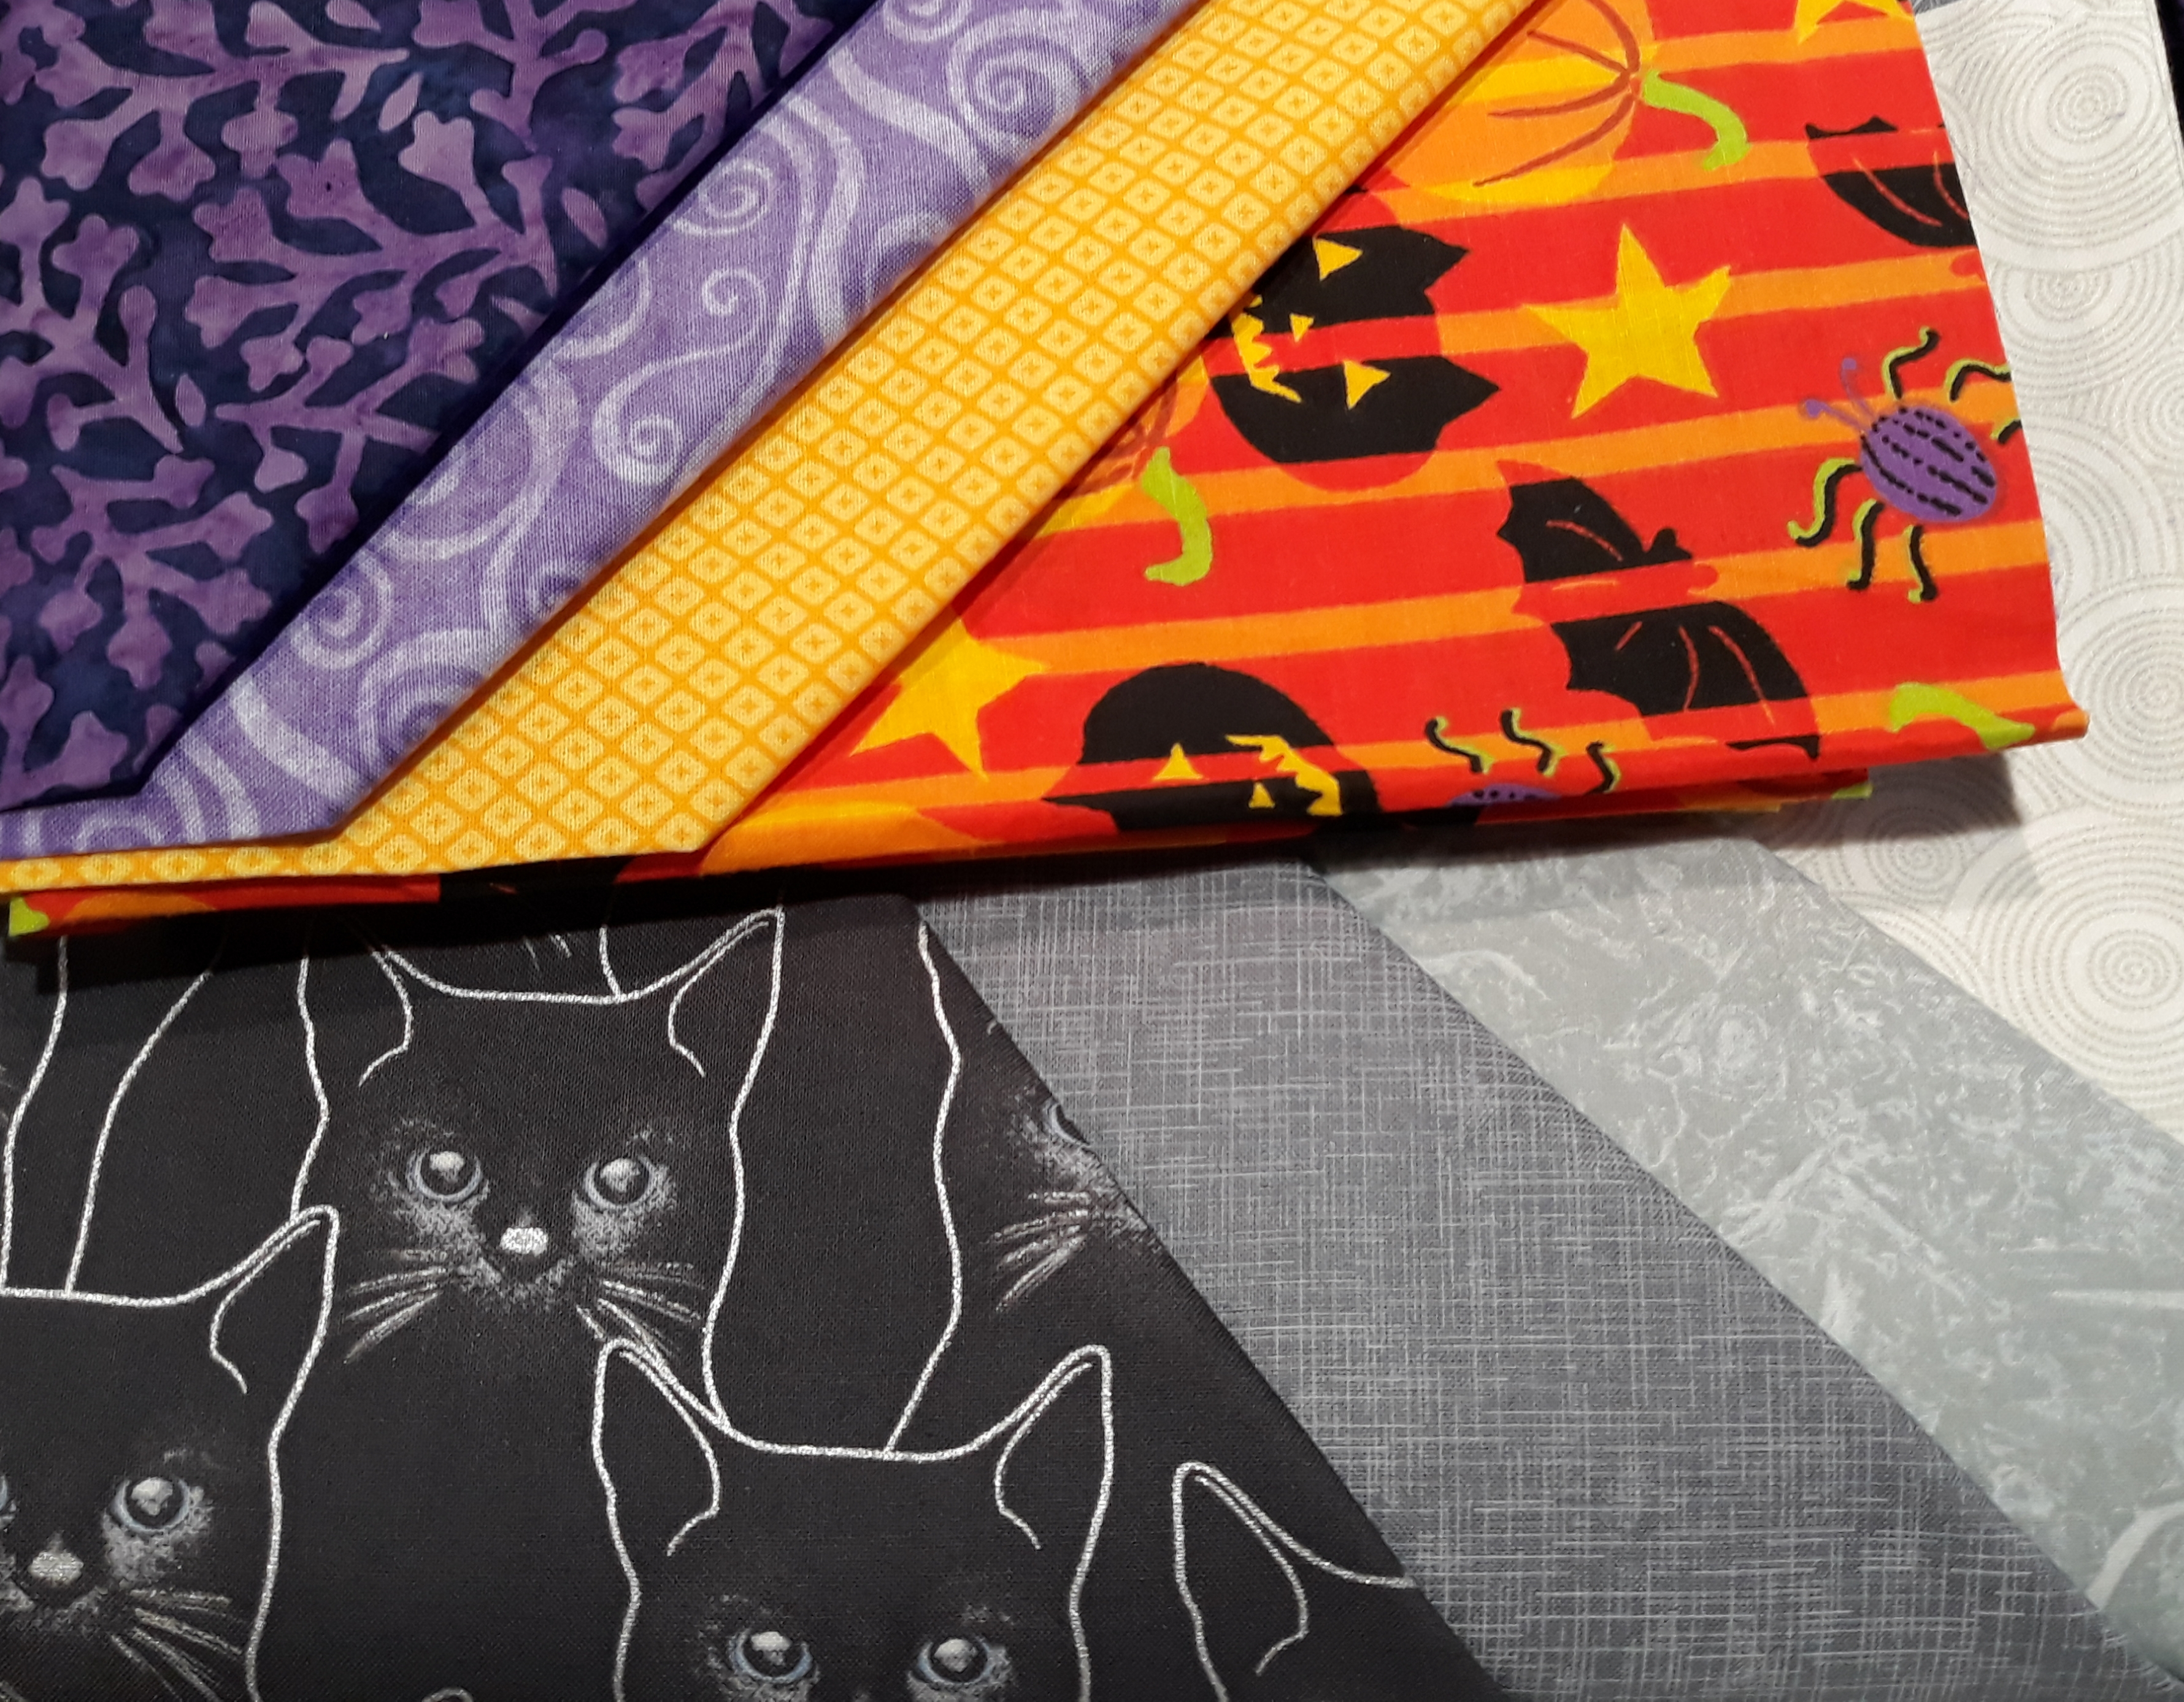
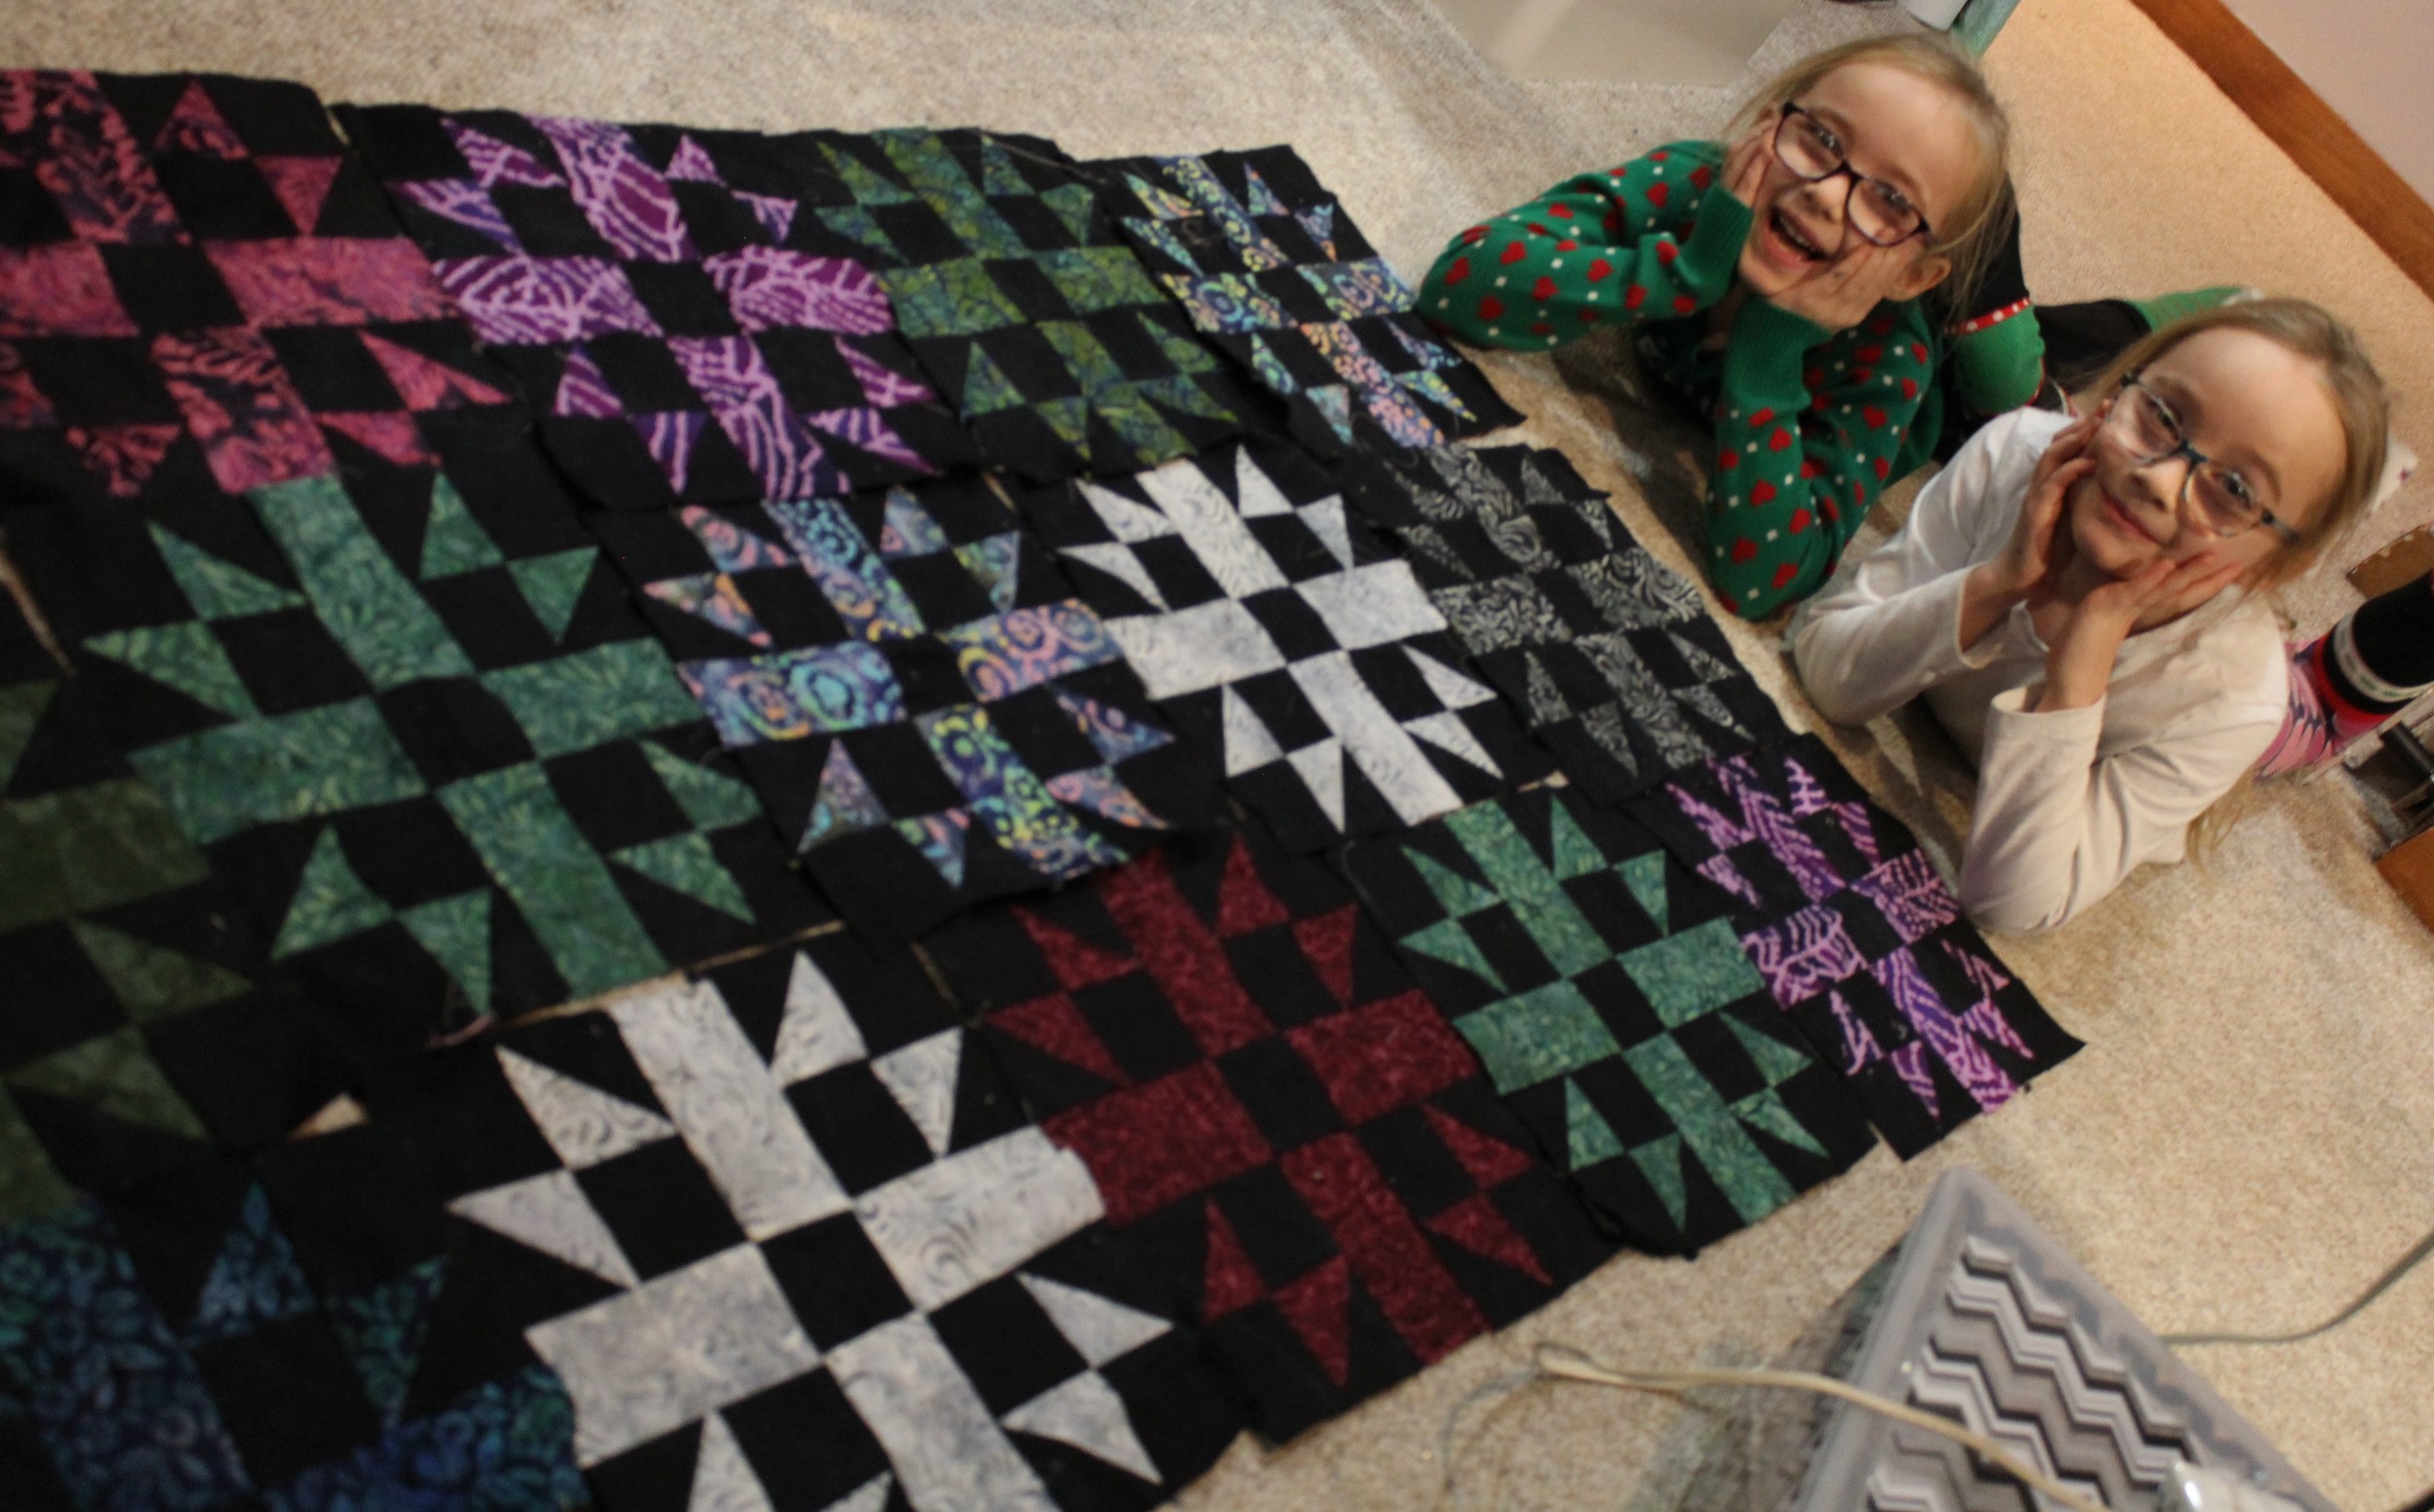
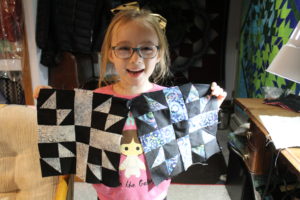
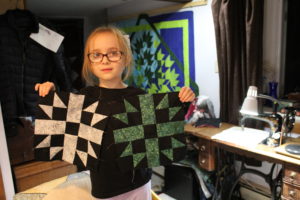
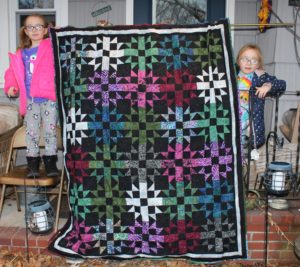
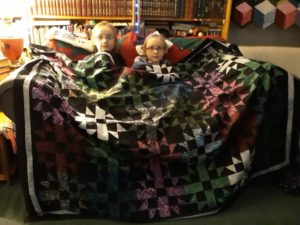
    Here’s the first half of the quilt!

By the end they got 3 blocks done on the last day! (and one of them found some time to throw together a little hooded costume! LOL)

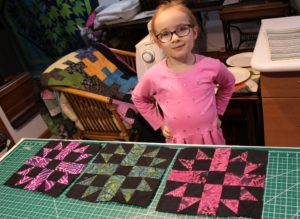
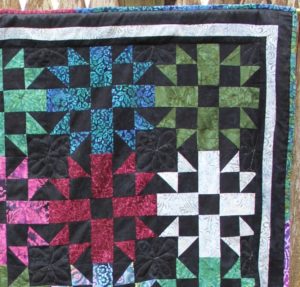
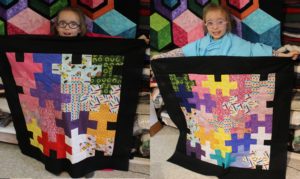
 Borders are on and it’s ready for quilting!

We backed it with fleece (using no batting) so it wouldn’t need too much quilting – just enough to hold it together.

Click on this link “Snow Flurries pattern” to get your free copy today!

Posted on

Magical Unicorn!

It’s all the craze! It seems like every young girl is into Unicorns lately; so I took it upon myself to create a pattern I could print out on letter paper and make available for all of you to download for free!

The pattern is easy enough that a 7 year old was able to make one – with a little help from an adult.  So here it is – my “Magical Unicorn” fun project #23 for you to download for FREE!  🙂

MAGICAL UNICORN instructions

Magical Unicorn Pattern Pieces

And here is a tutorial for you to follow along with while you create!  Have fun!!

Magical Unicorn Fun Project Series #23

Posted on

Out with the “OLD” – but let’s be nice!

Where did 2017 go?!  Wow – time really does fly when you are having fun – or just plain old. LOL

So here we are at the end of an old year and the beginning of a new one.  Many of us celebrate Christmas – and with that comes a Christmas tree and all the ornaments we put on it.  Some people like just some lights and fabric bows – others collect ornaments from past years – or ones their children made for them.  Sometimes it’s a real trip down memory lane!  I used to have a box full of memories – many of them breakable – that found a spot on my tree.  Hubby and I also used to insist on a “real” tree each year when the kids were small.  Along with the real tree came a real mess – and the need to dispose of the tree after Christmas was over.  We used to take off all the lights and ornaments, put them in a box and store them away – then cut up the very dry and hazardous tree and burn it in our fireplace on New Year’s Eve.  A “Yule Log” that would bring us good luck in the coming year.

Then one year after I packed all our breakable memories in a box and placed the box by the top of the cellar stairs (to bring down to storage later when I finished taking down more decorations), I went back to the living room to vacuum and tidy up.  Hubby’s brother was visiting and they were both well into celebrating New Year’s Eve.  As I was running the vacuum, the men decided to go out to the shed to get the saw to cut up the Christmas tree.  Hubby decided to use the back door to do this – which happens to be the door by the top of the cellar stairs.  He saw the “ornament” box – red & green Rubbermaid – and thought it strange that I didn’t bring it down the stairs.  He decided to help it on it’s way by nudging it with his boot till it toppled over the edge and rolled, bounced, twisted and opened all they way down the stairs.  I could hear it happening – even over the dun of the vacuum – and alas, knew I was too late to save the day.  All of our memories were broken into tiny little pieces all over the stairs.  When I got to the scene of the crime, Hubby was standing there with his jaw hanging wide and the guilty look a child gets when he’s caught with his hand in the cookie jar.  Well, nothing could be done to reverse the moment – so he continued out the door with apologies – to go get the saw; and I started vacuuming up all the pieces of the last 20 years from the cellar stairs.

For many years after that, we put up an artificial tree with nothing more than lights and some plaid fabric bows – with an occasional felt ornament here and there.  Then along came the grand children and some more lovely ornaments that were gifted to us from various people.  Then after many years of “fake” trees, we decided to go “real” again – and take the grandchildren “Christmas Tree Hunting” as a fun activity on a sleepover night.  I also chose this year to start a new tradition that I’d like to call a “Making Ornaments with your Grammy Party”.  We took a trip to the local pottery painting spot just a mile from my house – and painted our own ceramic very special ornaments.  Treasures I hope the children will keep and remember me by someday when they have their own homes and are decorating their own trees.  So, I thought – how can I make this a possibility – how can I keep these treasures safe – how can I teach the children to preserve and protect what we spent so much time painting and having fun making?  That’s when this quick idea came to me.  “Safe Pockets” – zip them up in a comfy soft bag of fleece and store them in a special box.  I went right out and bought decorative boxes for the children and then made a bunch of safe pocket sleeves.  My ornaments fill my sleeves and my box, but the children have big almost empty boxes with one sleeve that holds 6 ornaments.  This is so that they have something to look forward to in years to come.

Enjoy this quick tutorial “Safe Pockets – Fun Project #20” video.  Maybe you can use this method to preserve and protect your own breakable memories.  😉

Posted on

Cathedral Windows one stitch at a time!

I’m a little late posting this one, because it’s still a project in the making!  I’ve been interested in the Cathedral Window pattern for a very long time.  One of my best friends since 1st grade had one of these quilts hanging in her living room.  Her mom made it by hand and was taught by her great aunt – or something like that.  It’s kind of hard to remember – that was 50 years ago!

I stopped in for a visit in my old neighborhood recently, to have a cup of tea and visit with “Noni McRae” – this little old Italian lady who I have always adored.  I asked her if she could show me how to make a Cathedral Window Quilt block.  Her memory is not so great anymore – but she tried her best; folding and unfolding, cutting and snipping and folding some more – till I sort of understood where she was going with this.  We had a lovely visit and I thanked her graciously for showing me the block, and I went on my merry way – with a brand new interest in learning how to make a Cathedral Window quilt!!

I must say, that the instructions I received were not complete – so I went on to research the technique and found that there were not a lot of people out there doing this by hand anymore.  I understand we live in an “instant” society – but I didn’t want this age old pattern to die, so I took it upon myself to make a video to teach anyone who loves to hand sew – how to go about making one of these quilts.

Well, to make the video – I needed to make the quilt; and I have to say that I have very limited time to sit and hand stitch an entire quilt.  So I decided to start it in January when I flew to Florida for a family vacation and then I took it with me again in March when I moved my sister from Miami to Boston during a 5 day road trip.  Maybe you’ll see your town in the video!

So I applaud you Noni!!  Thank you so much for all your effort – this one’s for you!

Posted on

Lobster Fingers! Fun Project #15

What?! More like “save our fingers” when shucking that yummy lobster!  This is a very useful “fun project” if you like eating boiled or steamed lobster.  So quick to make – you can make a couple sets in just an hour!  Makes a great gift paired with some lobster eating tools and a fresh live lobster!  Click on this link:  Lobster Fingers for a FREE PATTERN  to make a few sets for your next lobster bake.